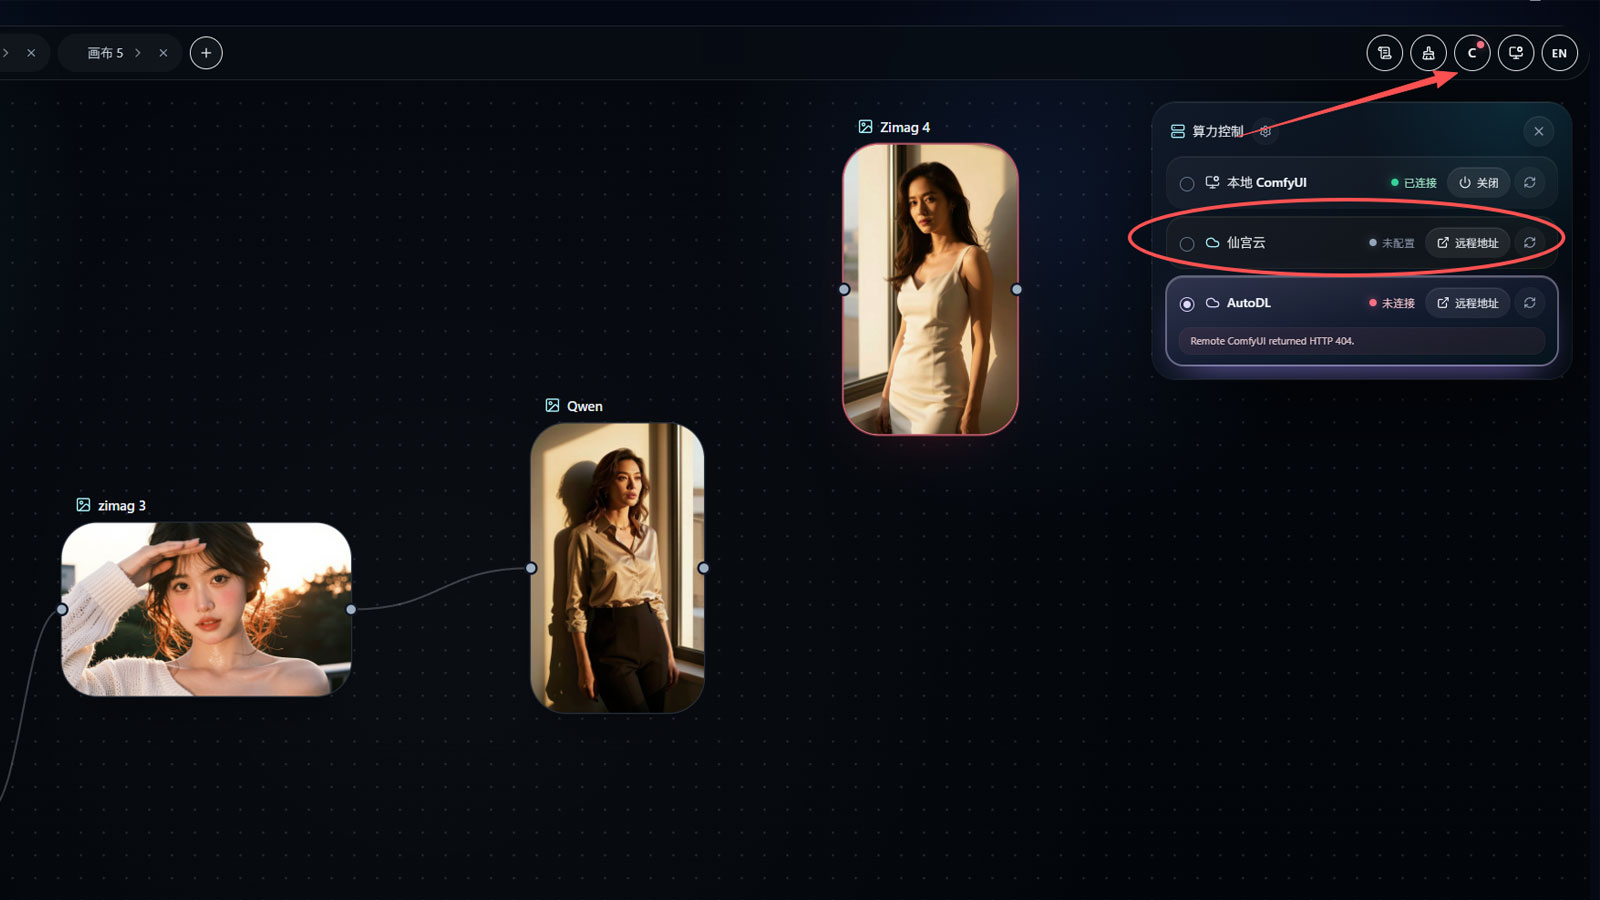
Xiangongyun Cloud GPU Deployment
This guide explains how to deploy the DFCine canvas integrated ComfyUI package on Xiangongyun, then connect the cloud GPU instance to DFCine.
Step 1: Find the DFCine Image
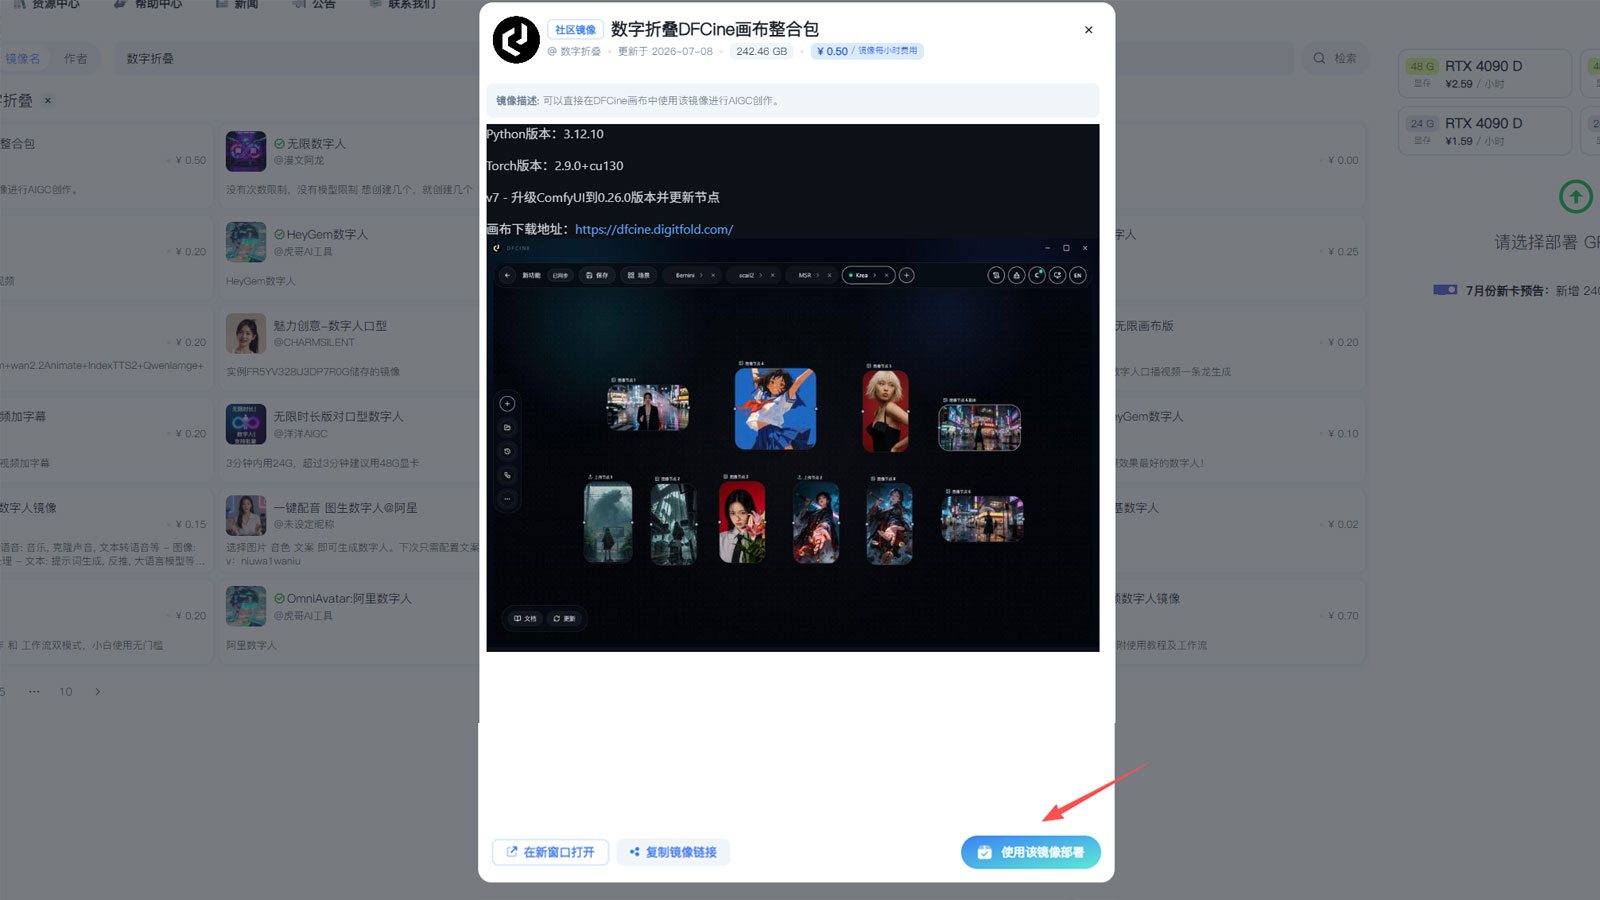
Visit Xiangongyun and register an account. In Deploy GPU, search for 数字折叠, then find the image named 数字折叠DFCine画布整合包镜像.

Step 2: Deploy with the Image
Click the image, then choose to deploy with this image.
Step 3: Choose a GPU Type
On the right side of the deployment page, select the GPU type you need. Different GPU types have different prices. Before deploying, confirm that your account balance is sufficient, then click Deploy.

Step 4: Copy the Instance ID
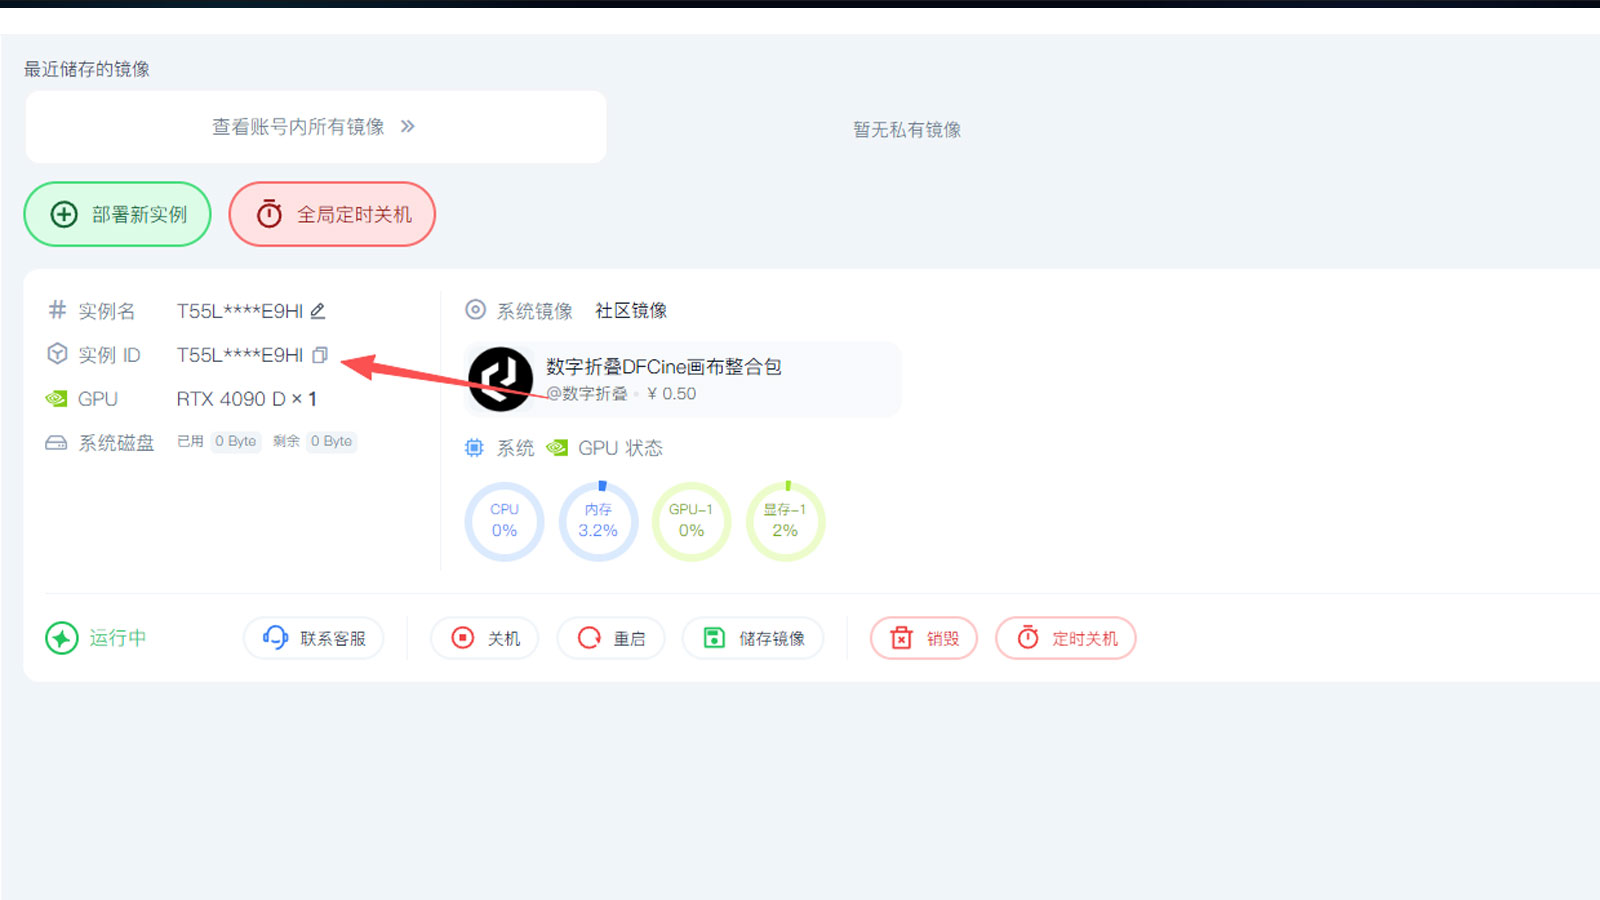
Wait for the deployment to finish, then copy the instance ID shown on the page.
Step 5: Configure Cloud Computing in DFCine
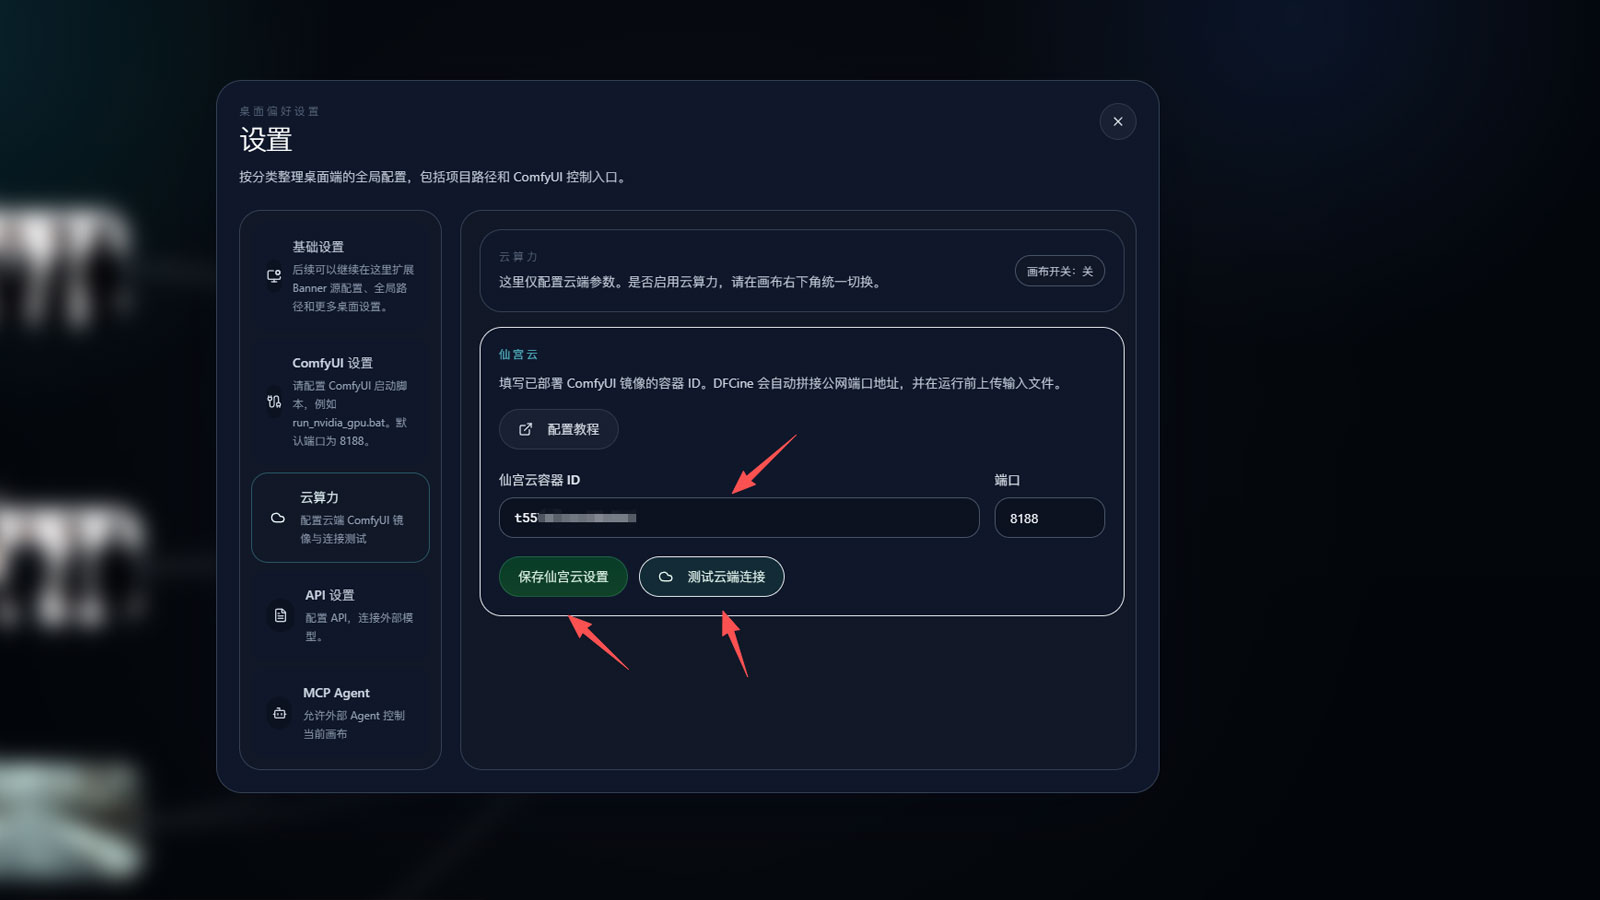
In the DFCine canvas, open Settings > Cloud Computing. Paste the copied instance ID into the specified field, save the settings, then click Test Cloud Connection to check whether DFCine can connect normally.
Step 6: Check the Cloud ComfyUI Page
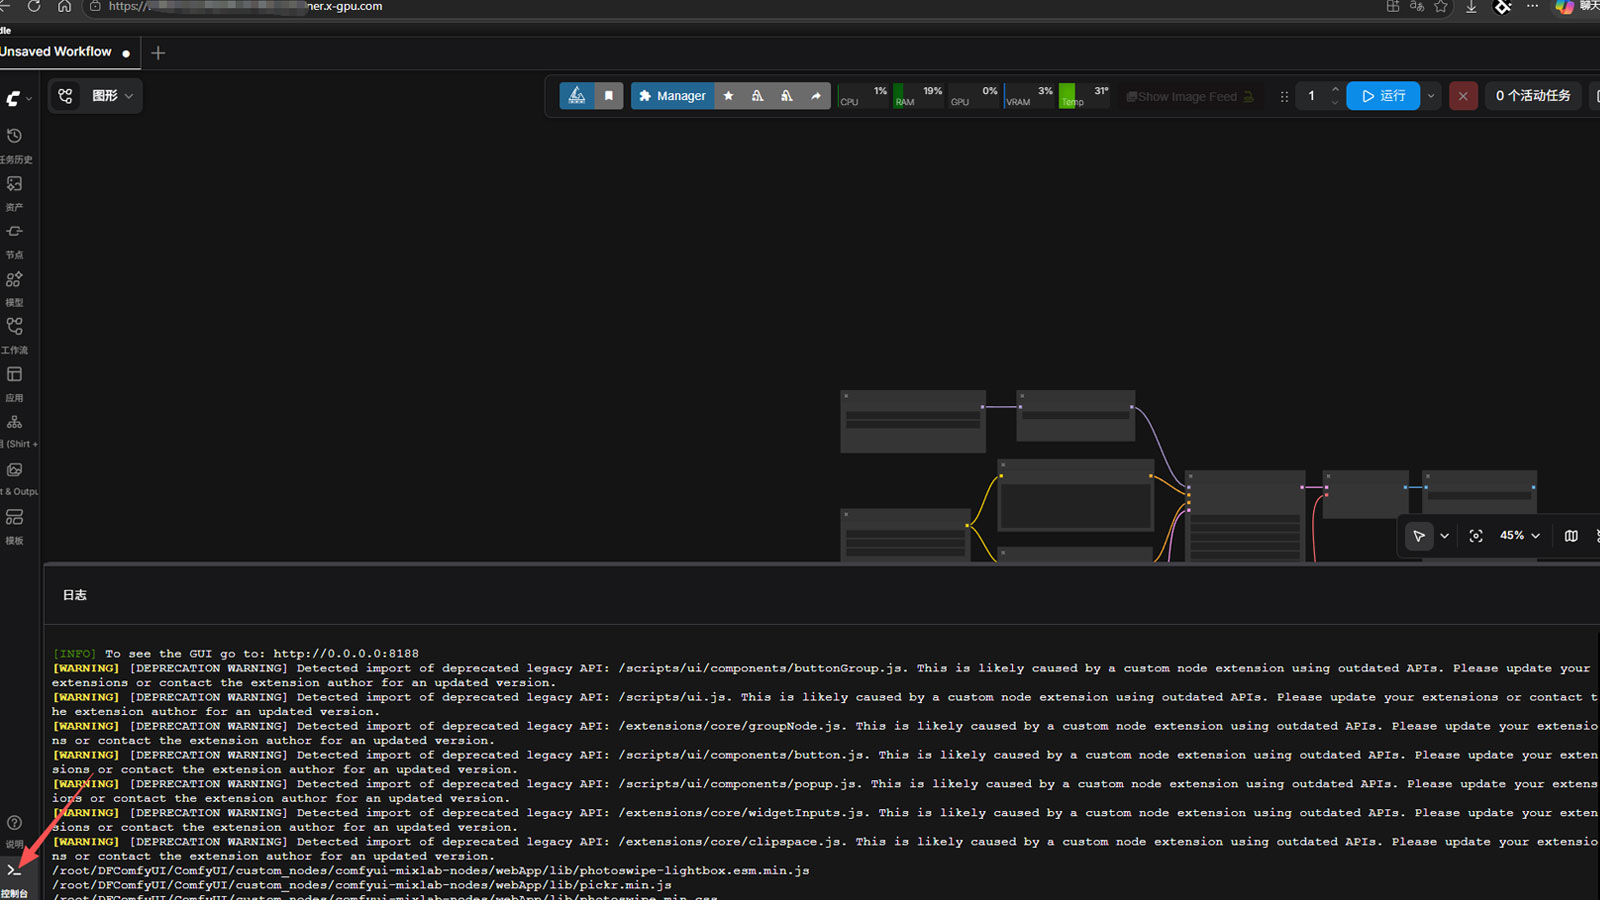
You can copy the test connection URL and open it in a browser. If the connection is working, you will see the cloud ComfyUI page. You can also use the console window information to judge the current running status.
Step 7: Use and Clean Up Cloud Computing
Click the C Compute Control button in the upper-right corner of the canvas. In the compute control panel, select Xiangongyun. After confirming that the Xiangongyun connection is available, run a node that contains a ComfyUI workflow. The computation will now use the Xiangongyun GPU.
You can click the Clean Up button at the top to clean up the ComfyUI instance on the cloud. After finishing your work, click Destroy so billing stops. The next time you need cloud computing, you can deploy again with one click.