
Page Layout
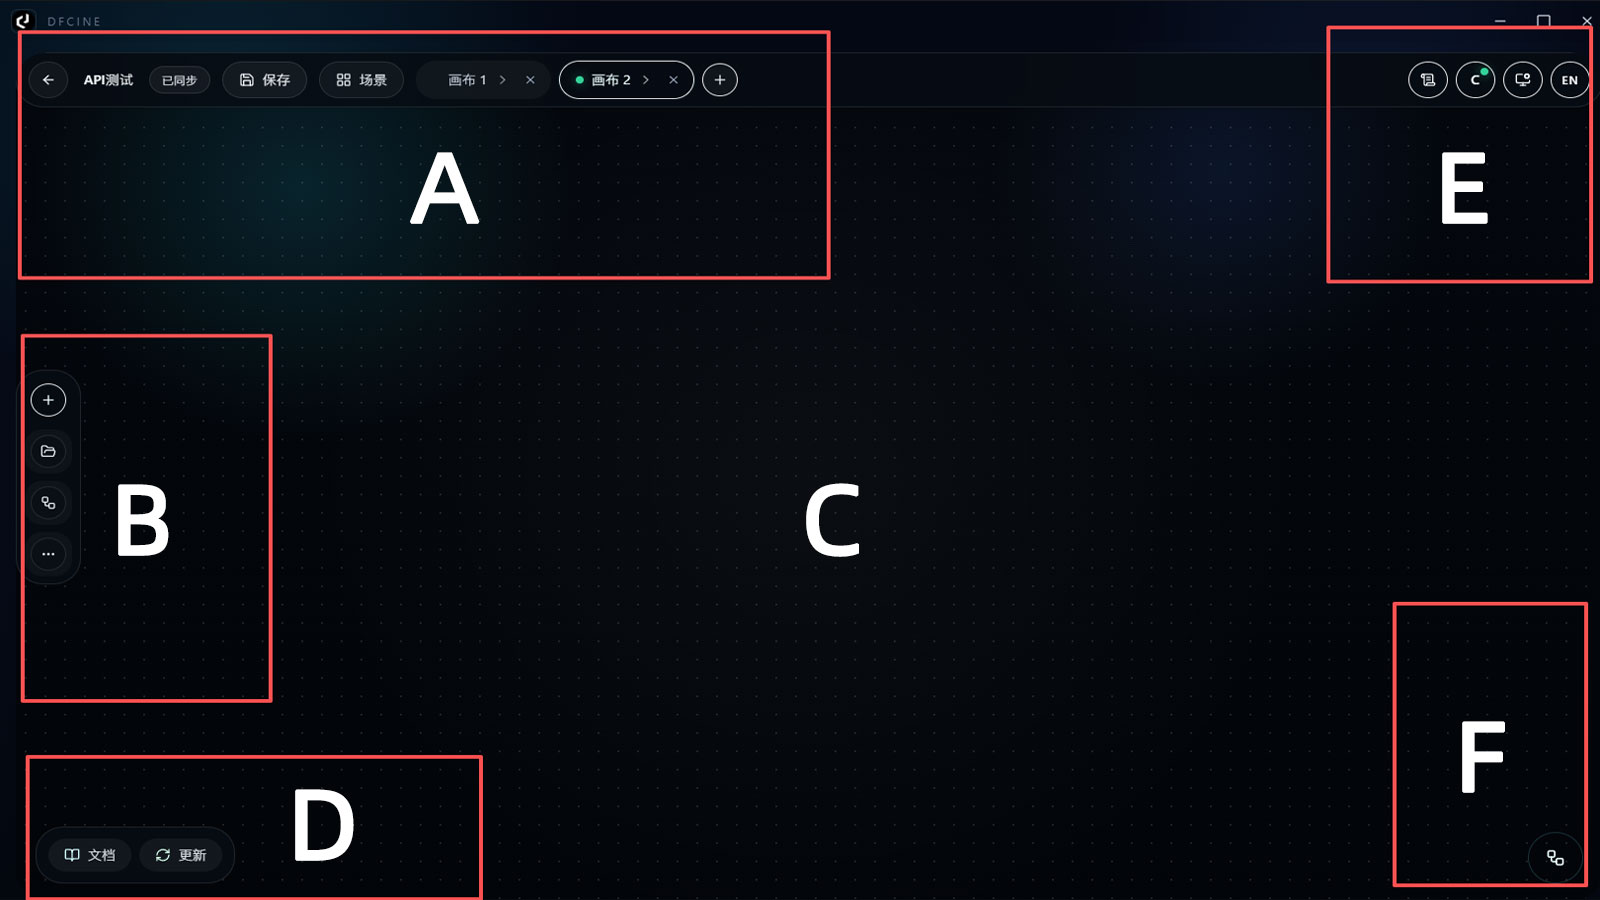
The software workspace can be divided into six functional areas, as shown above. The following sections explain each area in detail.
A - Multi-Canvas Management Area
This area manages project navigation and canvas organization.
- Click the leftmost arrow to exit the current project.
- Click the Save button to save the current work. The project is also auto-saved at regular intervals.
- The canvas list below the Scene button lets you switch the active canvas or delete a canvas.
- The plus button on the far right creates a new canvas.
B - Toolbar
This area serves as the main tool entry point, and most future extensions will be introduced here.
- The first plus button opens the node menu, where you can create different types of nodes on the canvas as needed.
- Features related to the Asset Library, Template Library, and Utilities are still under development and will be released in later versions.
C - Node Operation Area
This is the core working area of the software. It is used to build AI workflows and run creative tasks. Multiple nodes can be created and used together.
D - Official Links Area
This area provides two remote information entry points.
- Documentation opens the official canvas documentation.
- Update shows the latest official software release information.
E - Software Settings Area
This area is used for common software settings and monitoring.
- Communication logs: view communication status and task monitoring information during AI task execution.
- ComfyUI controls: start or stop ComfyUI.
- Software settings: configure global options.
- Language switch: switch between Chinese and English.
F - AI Agent Area
This area is the control entry for AI Agents. After integration, it can be used to automate canvas workflows. This feature is still under development.