AutoDL Cloud GPU Deployment
This guide explains how to deploy the DigitalFold DFCine Infinite Canvas Dedicated Image on AutoDL and use its cloud GPU as the ComfyUI compute target for DFCine.
Before you begin, upgrade DFCine to version 0.2.0 or later.
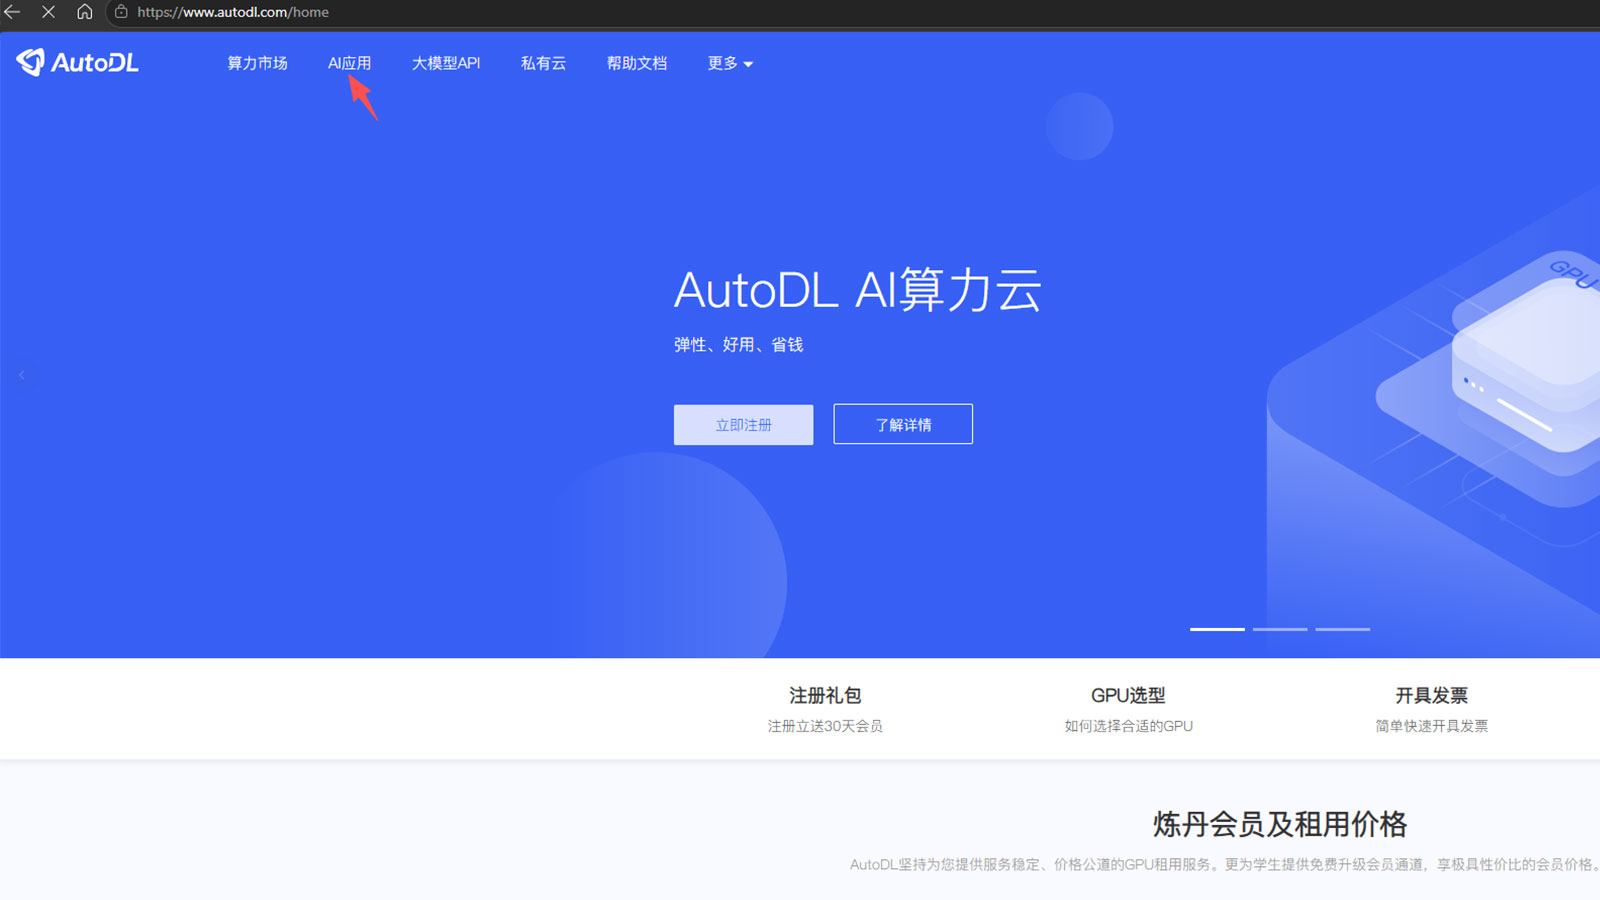
Step 1: Open AutoDL AI Apps
Visit AutoDL, sign in to your account, and click AI应用 (AI Apps) in the top navigation bar.
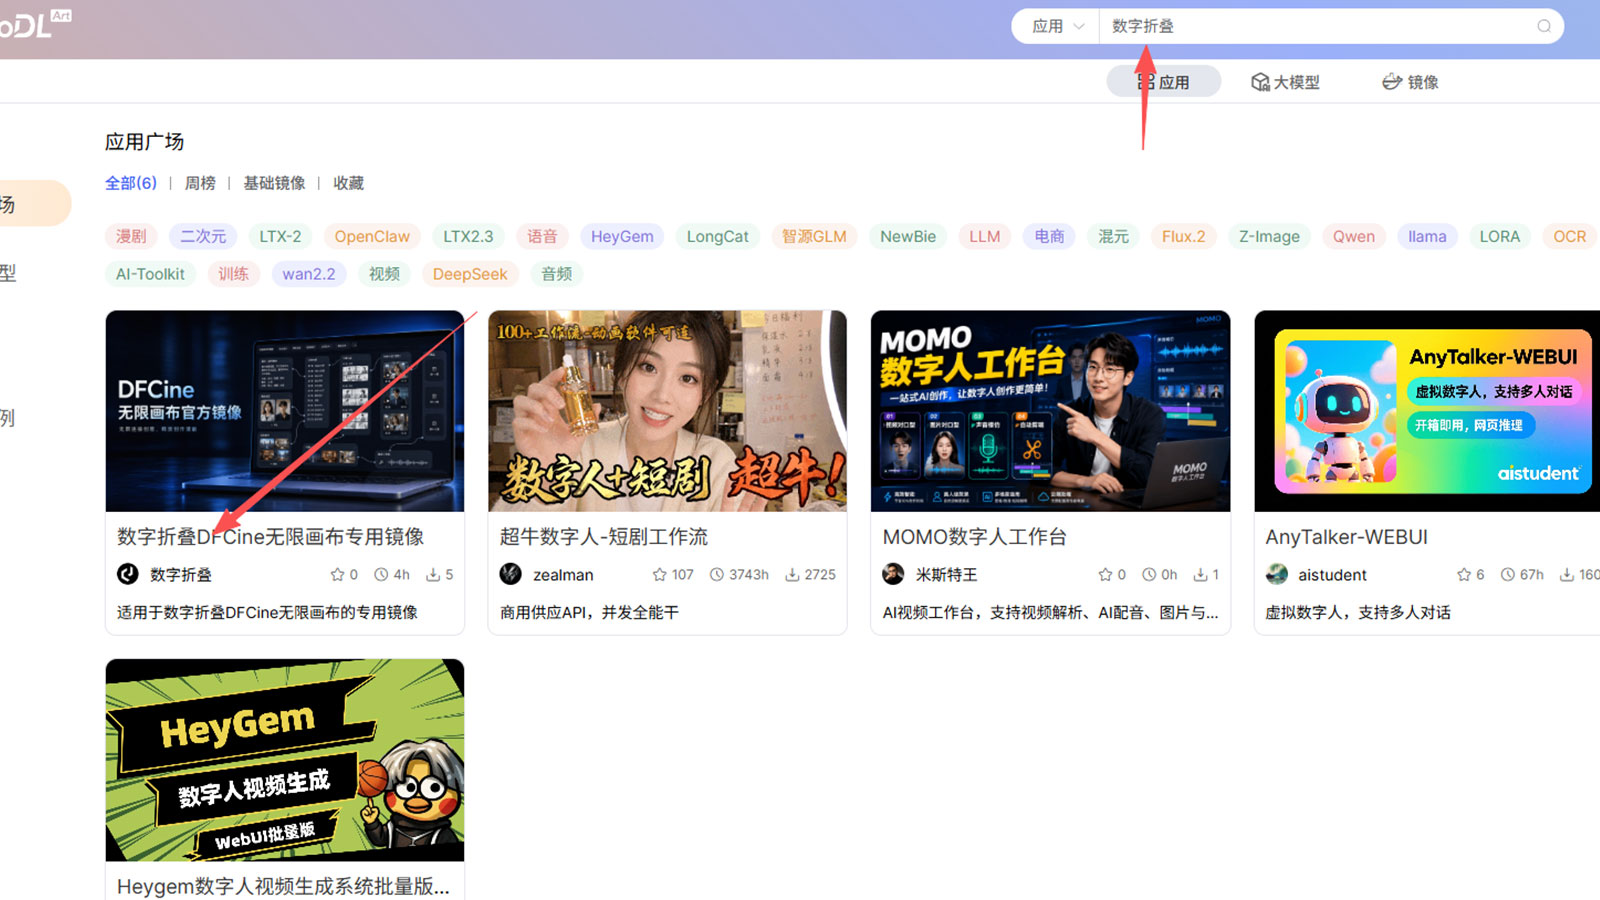
Step 2: Find the Dedicated DFCine Image
Search for 数字折叠 in the app marketplace. Find 数字折叠DFCine无限画布专用镜像 (DigitalFold DFCine Infinite Canvas Dedicated Image), then open the app.
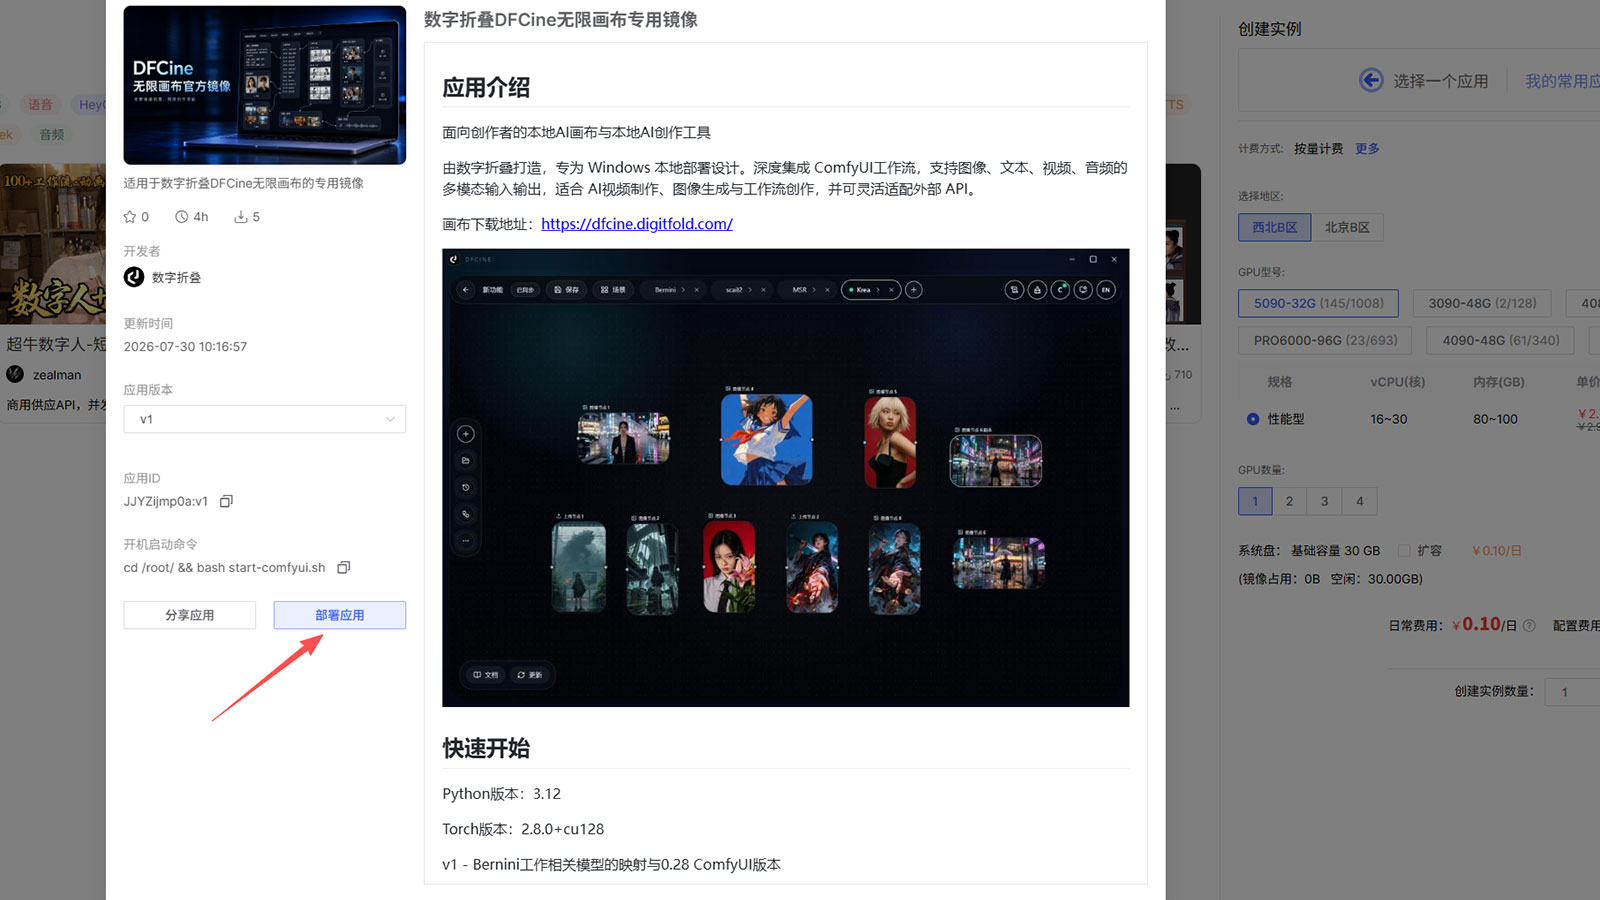
Step 3: Review the Image and Deploy
In the image details window, review the introduction and the DFCine canvas workflows currently supported by the image. When you are ready, click 部署应用 (Deploy App).
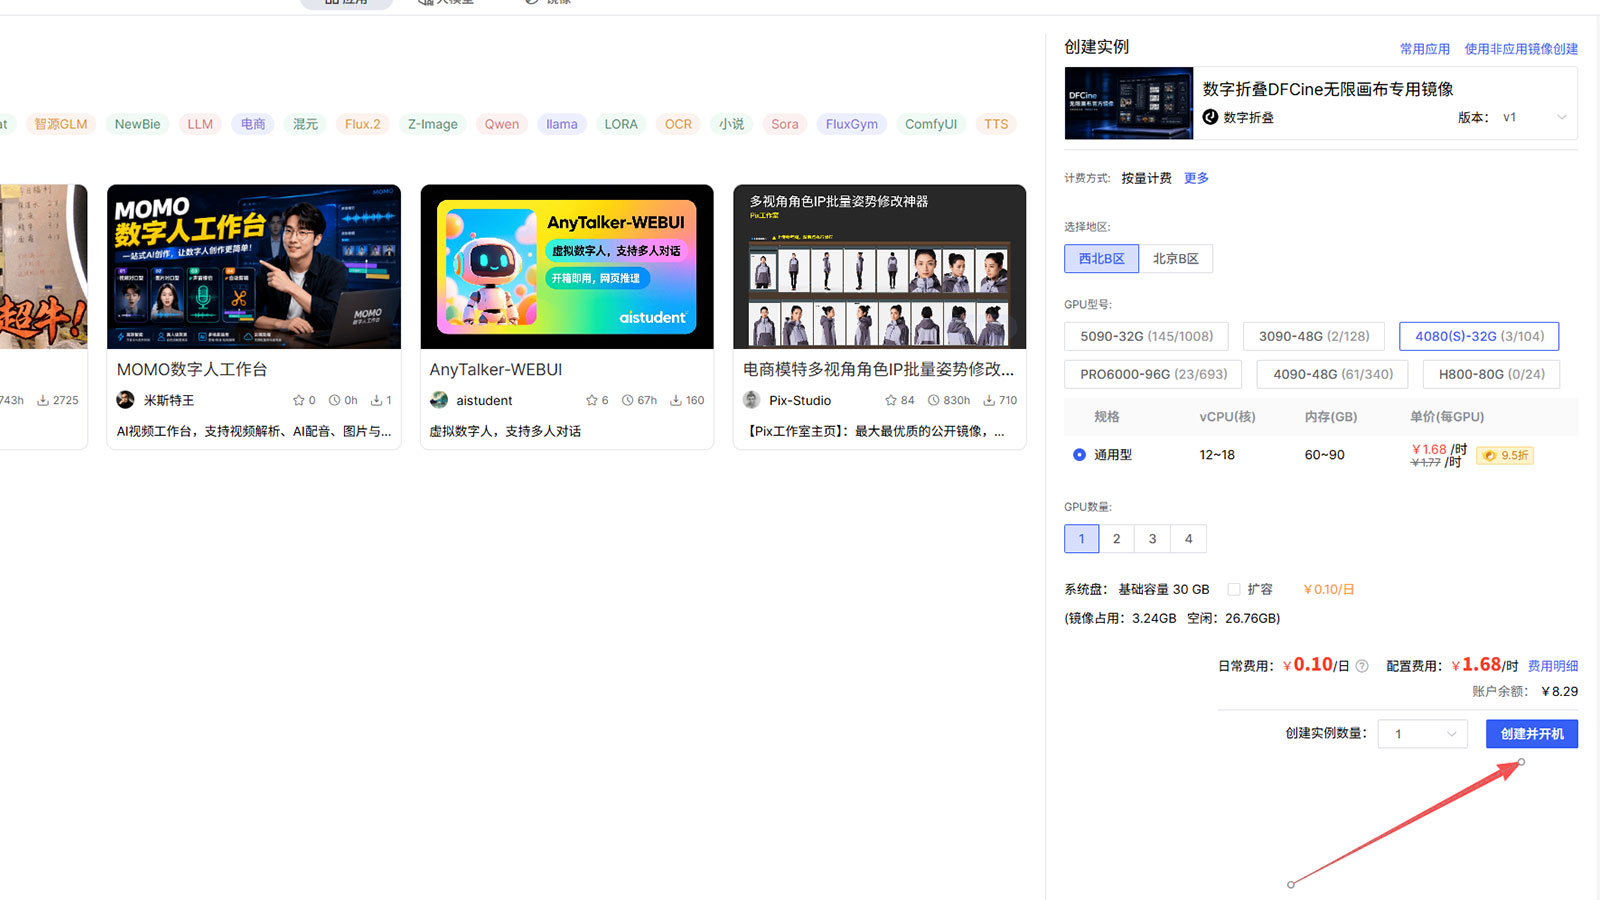
Step 4: Choose a Configuration and Start the Instance
Choose a region, GPU model, GPU quantity, and any other options required by your workflows. Then click 创建并开机 (Create and Power On).
Pricing varies by GPU configuration. For your first test, consider adding a small account balance and starting with one GPU.
Step 5: Open Cloud ComfyUI and Copy Its Address
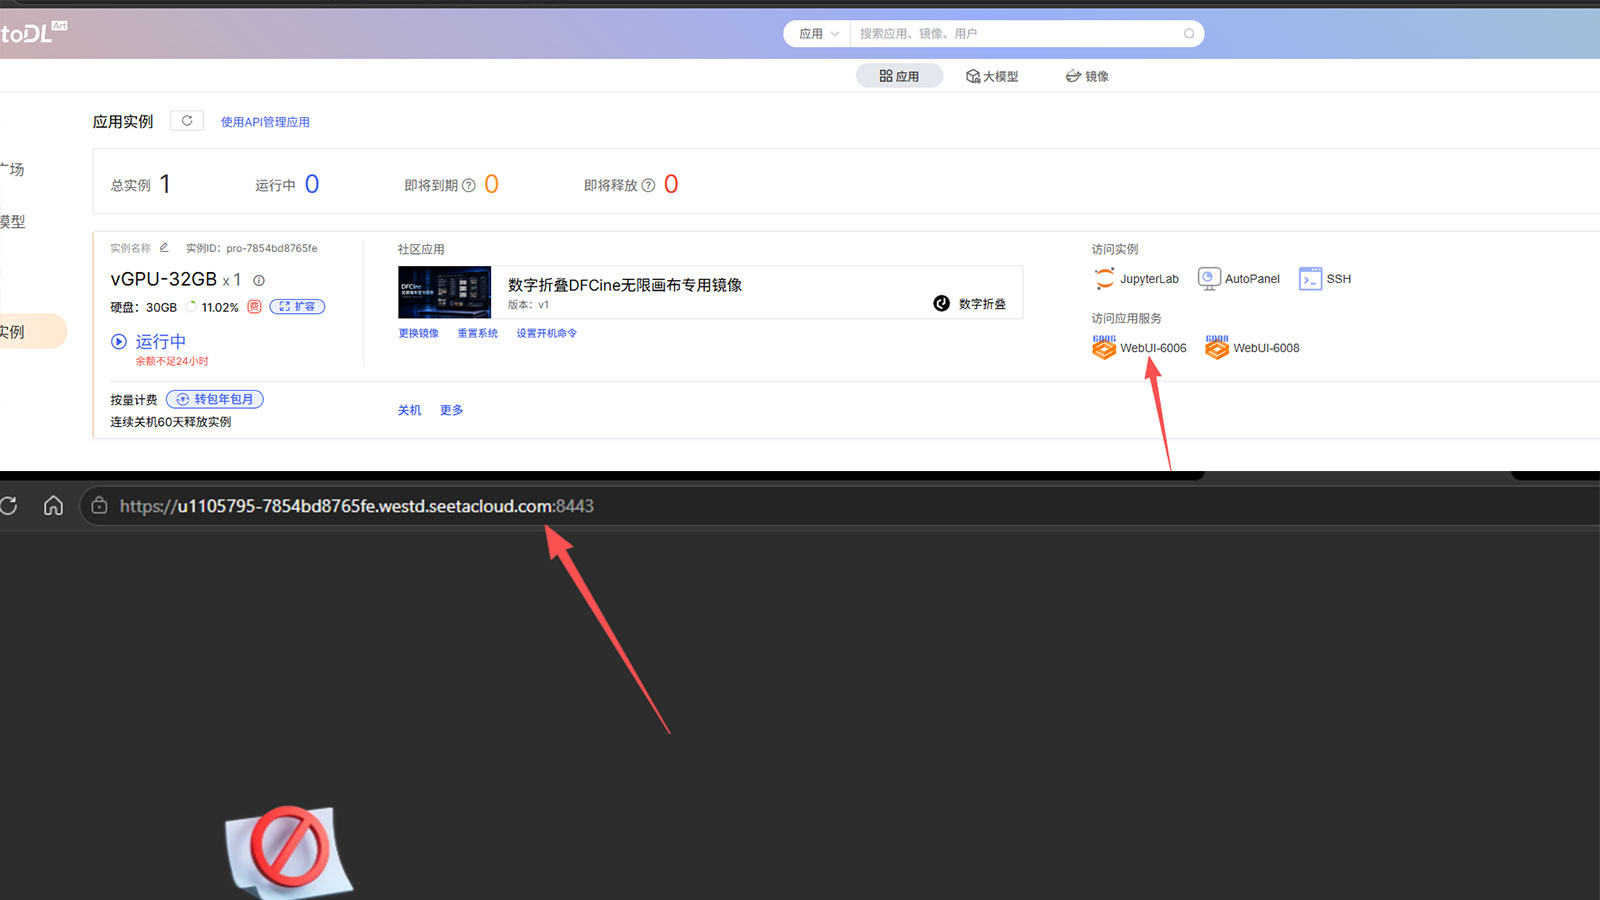
Wait until the instance has been created and is running. In 访问应用服务 (Access Application Services), click WebUI-6006.
AutoDL opens the cloud ComfyUI page in your browser. Copy the complete address from the browser address bar. It usually looks like:
https://xxxxxxxx-xxxxxxxxxxxx.westd.seetacloud.com:8443Copy the full address, including https:// and the port number. Do not share your private instance address publicly.
Step 6: Configure AutoDL in DFCine
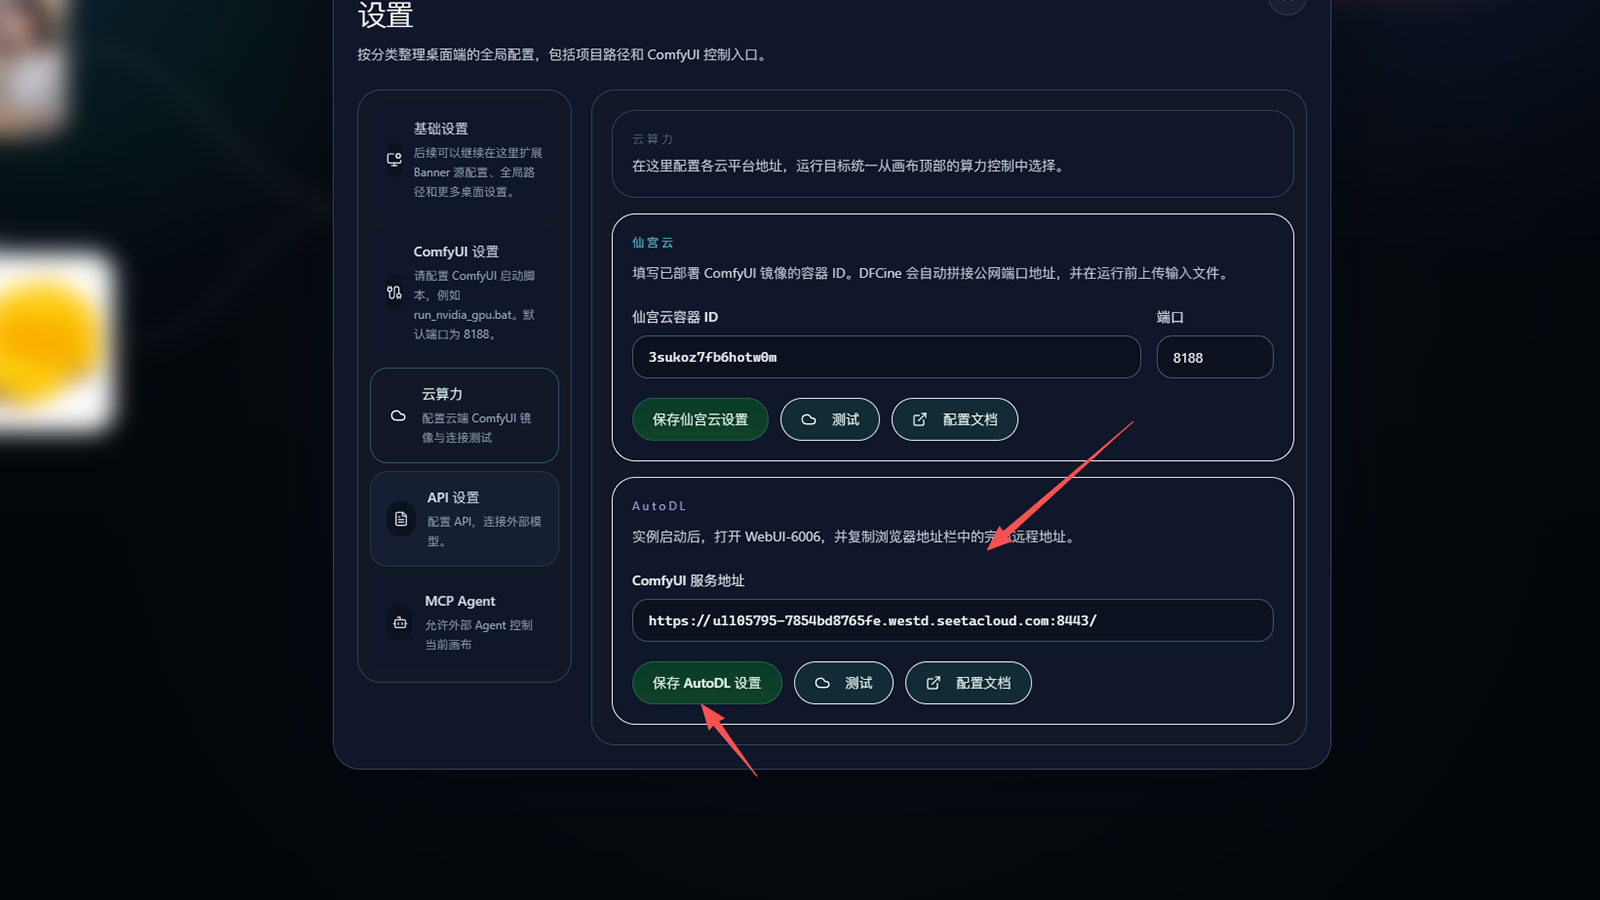
Return to the DFCine canvas and open Settings > Cloud Computing. In the AutoDL section, paste the complete address into ComfyUI Service Address.
Click Save AutoDL Settings, then click Test. Continue after DFCine reports a successful connection.
Step 7: Select AutoDL as the Compute Target
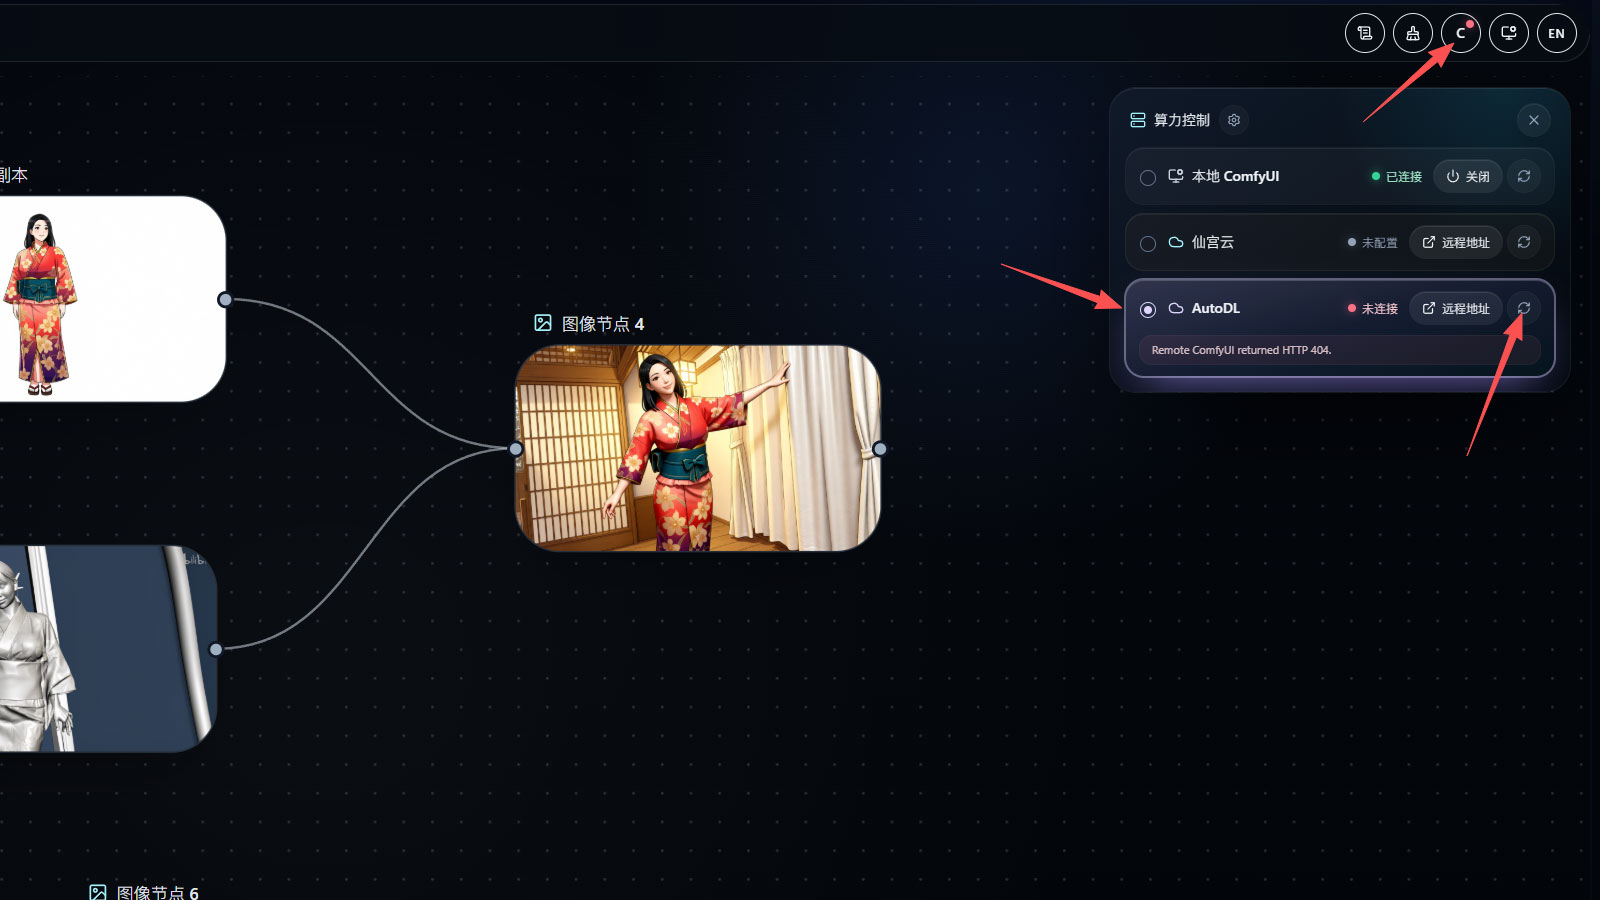
Return to the canvas and click the C Compute Control button in the upper-right corner. Select AutoDL in the compute control panel. After confirming that the connection is available, ComfyUI workflows on the canvas will run through this AutoDL instance.
The screenshot shows where to open Compute Control and select AutoDL. During actual use, confirm that the AutoDL card reports a successful connection.
Step 8: Shut Down and Release the Instance
After each workflow finishes, DFCine immediately downloads the generated results and saves them in your local project.
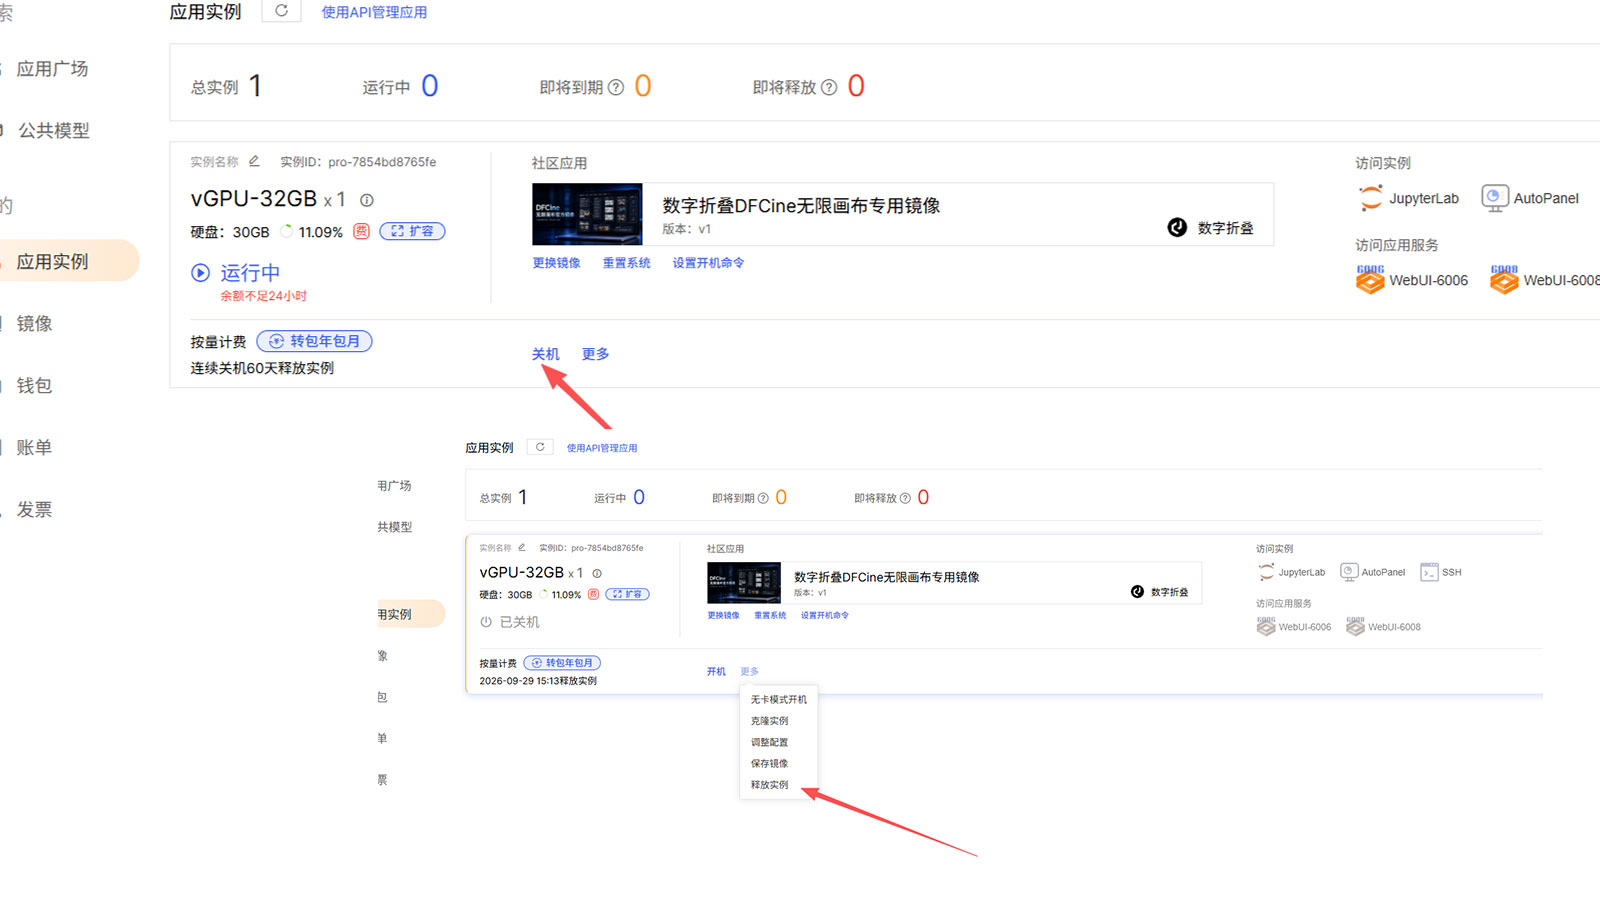
When you no longer need cloud computing, return to the AutoDL console:
- Click 关机 (Shut Down) to stop the running instance.
- After shutdown, click 更多 > 释放实例 (More > Release Instance).
Releasing an instance cannot be undone, so confirm that all required results have been saved locally first. Billing rules may change; refer to the current pricing information shown in the AutoDL console.