LightCC Cloud GPU Deployment
This guide explains how to create the DigitalFold DFCine Bundle on LightCC and use its cloud GPU as the ComfyUI compute target for the DFCine canvas.
A running application may continue to incur charges. For your first test, start with one GPU and verify the connection and workflow execution before using a larger configuration.
Step 1: Find the DFCine Bundle
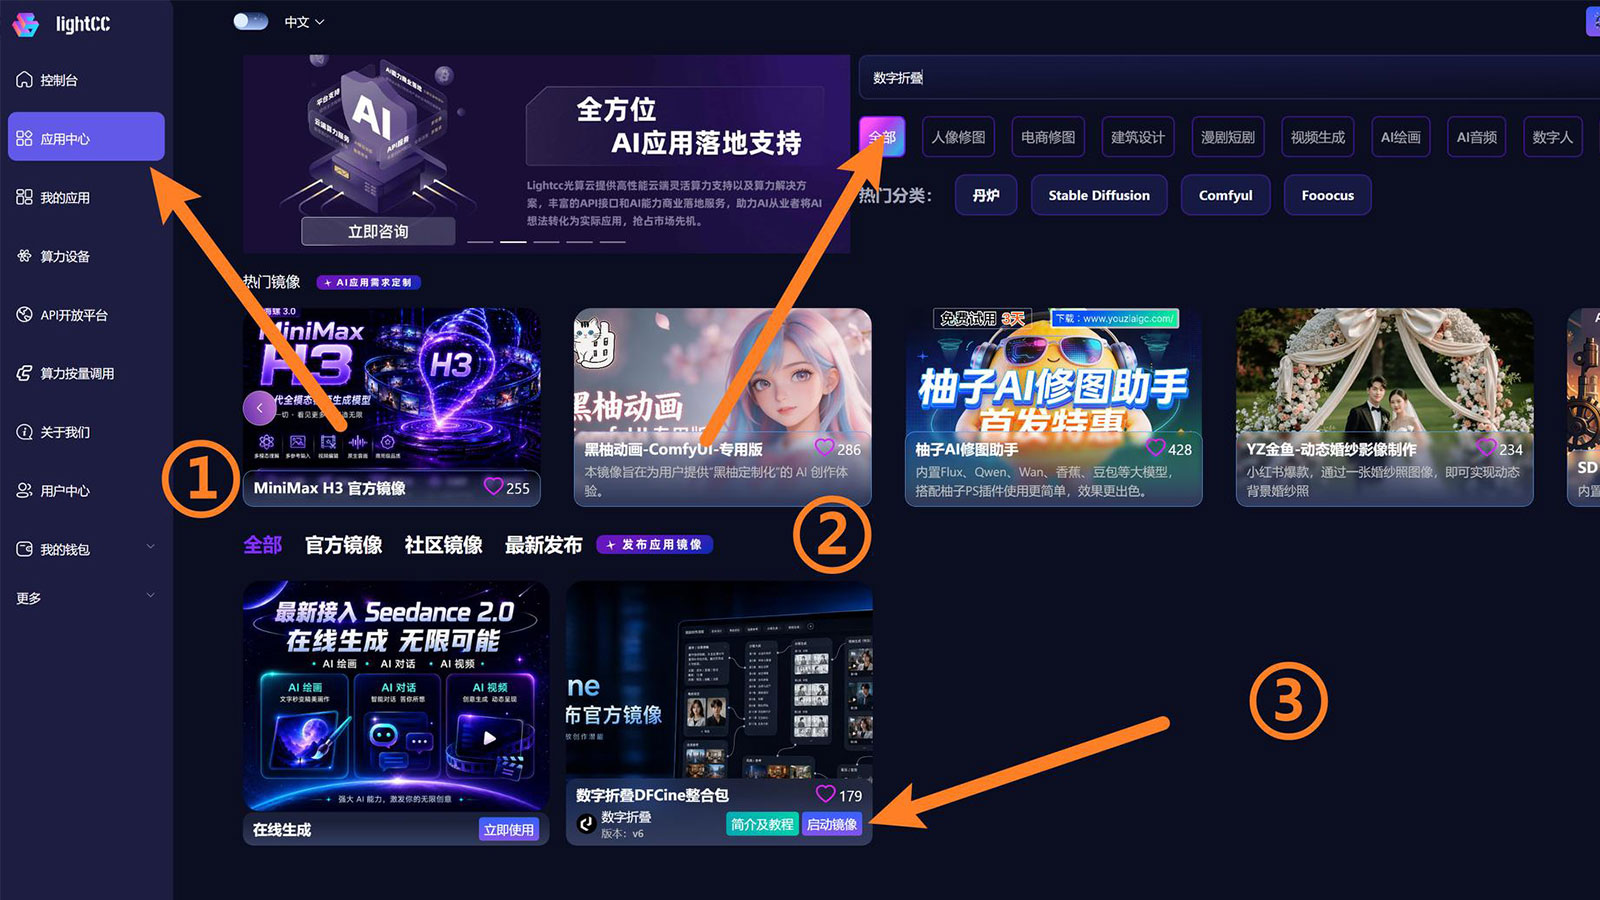
Visit LightCC, sign in to your account, and open 应用中心 (App Center) from the left sidebar.
Select 全部 (All), find 数字折叠 DFCine 整合包 (DigitalFold DFCine Bundle), and click 启动镜像 (Launch Image).
Step 2: Choose a GPU and Create the Application
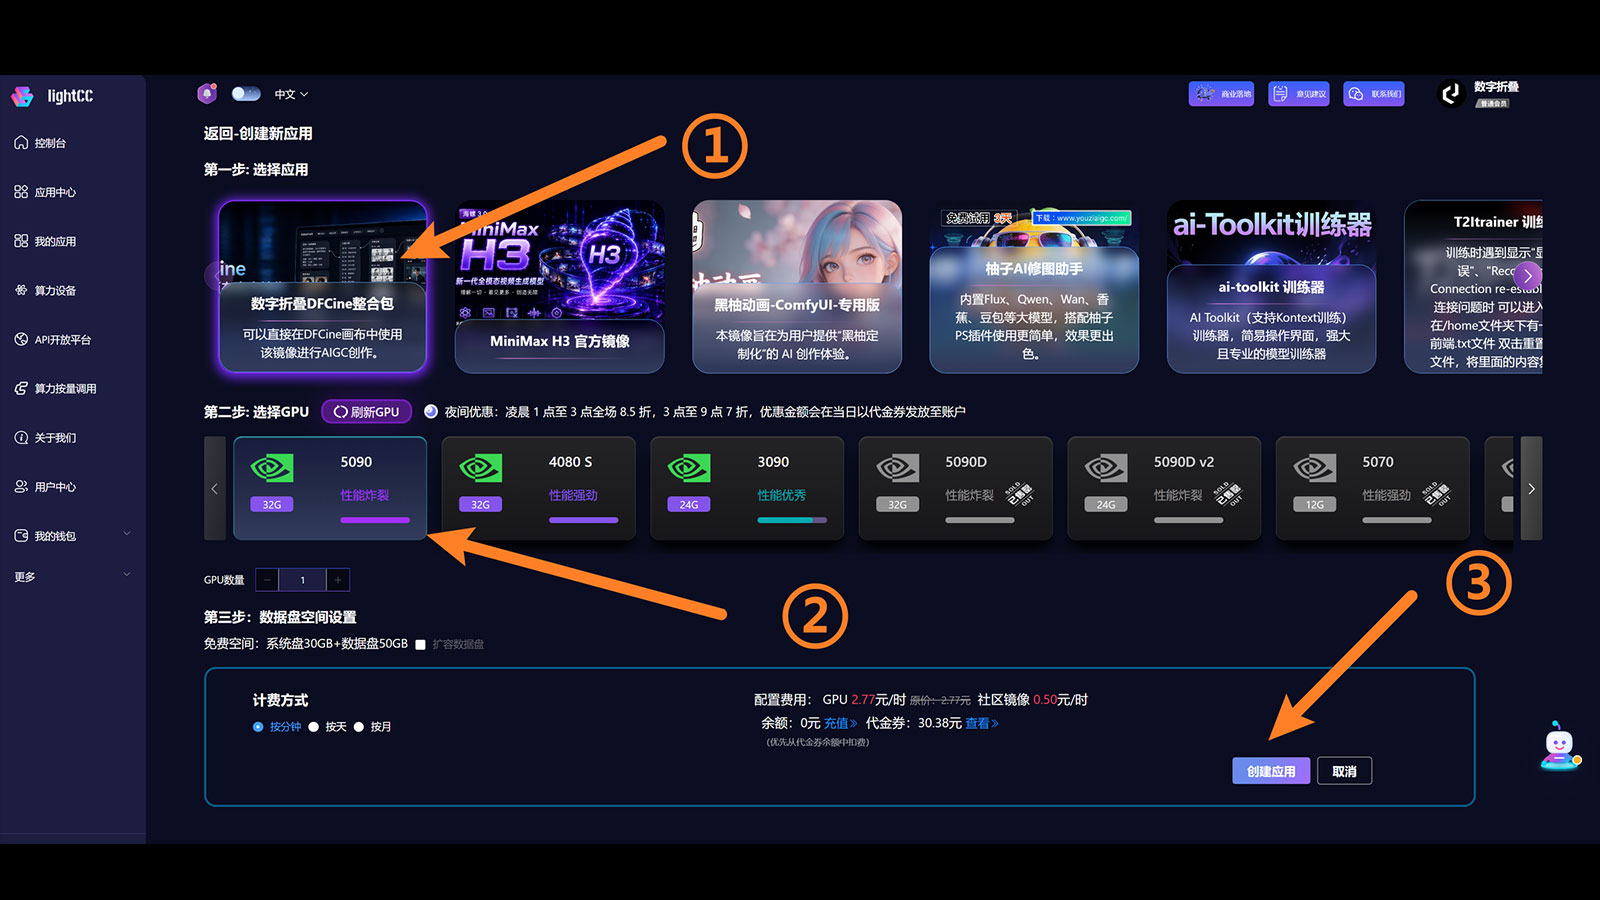
On the creation page, select the DigitalFold DFCine Bundle, a GPU model, and the number of GPUs. Configure data-disk space and a billing option as needed.
Prices vary by GPU and billing option. Refer to the current price shown on the creation page, then click 创建应用 (Create Application).
Step 3: Wait for the Application and Open It
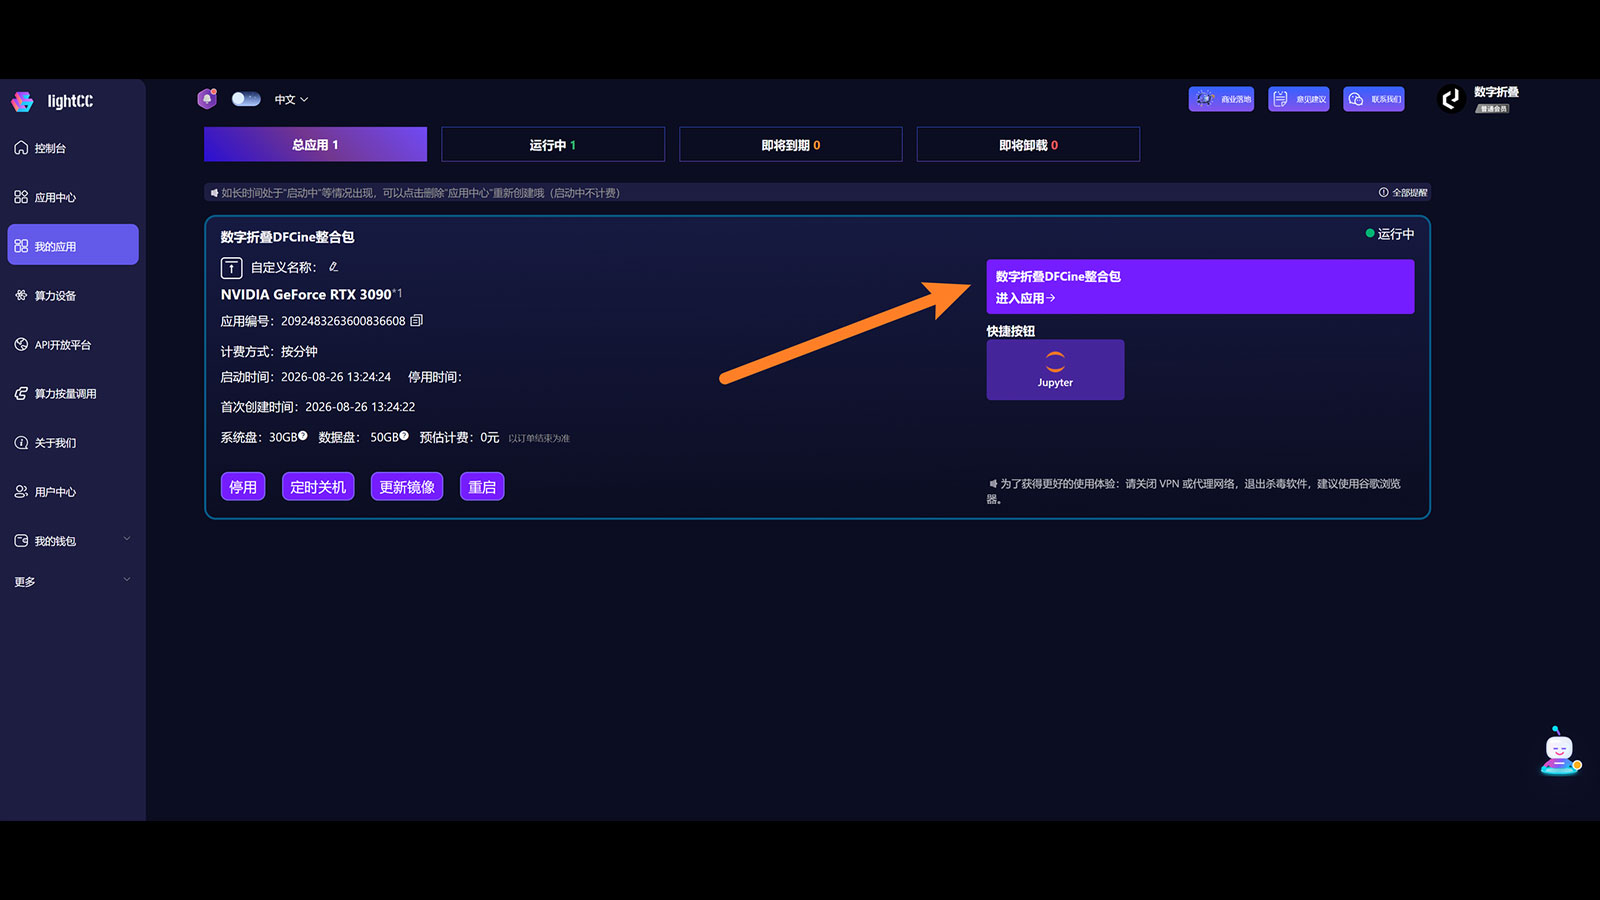
After creation, open 我的应用 (My Apps) from the left sidebar. Wait until the application status changes to 运行中 (Running), then click 进入应用 (Enter Application).
If the application is still starting, wait briefly and refresh the page instead of creating another instance.
Step 4: Copy the Cloud ComfyUI Address
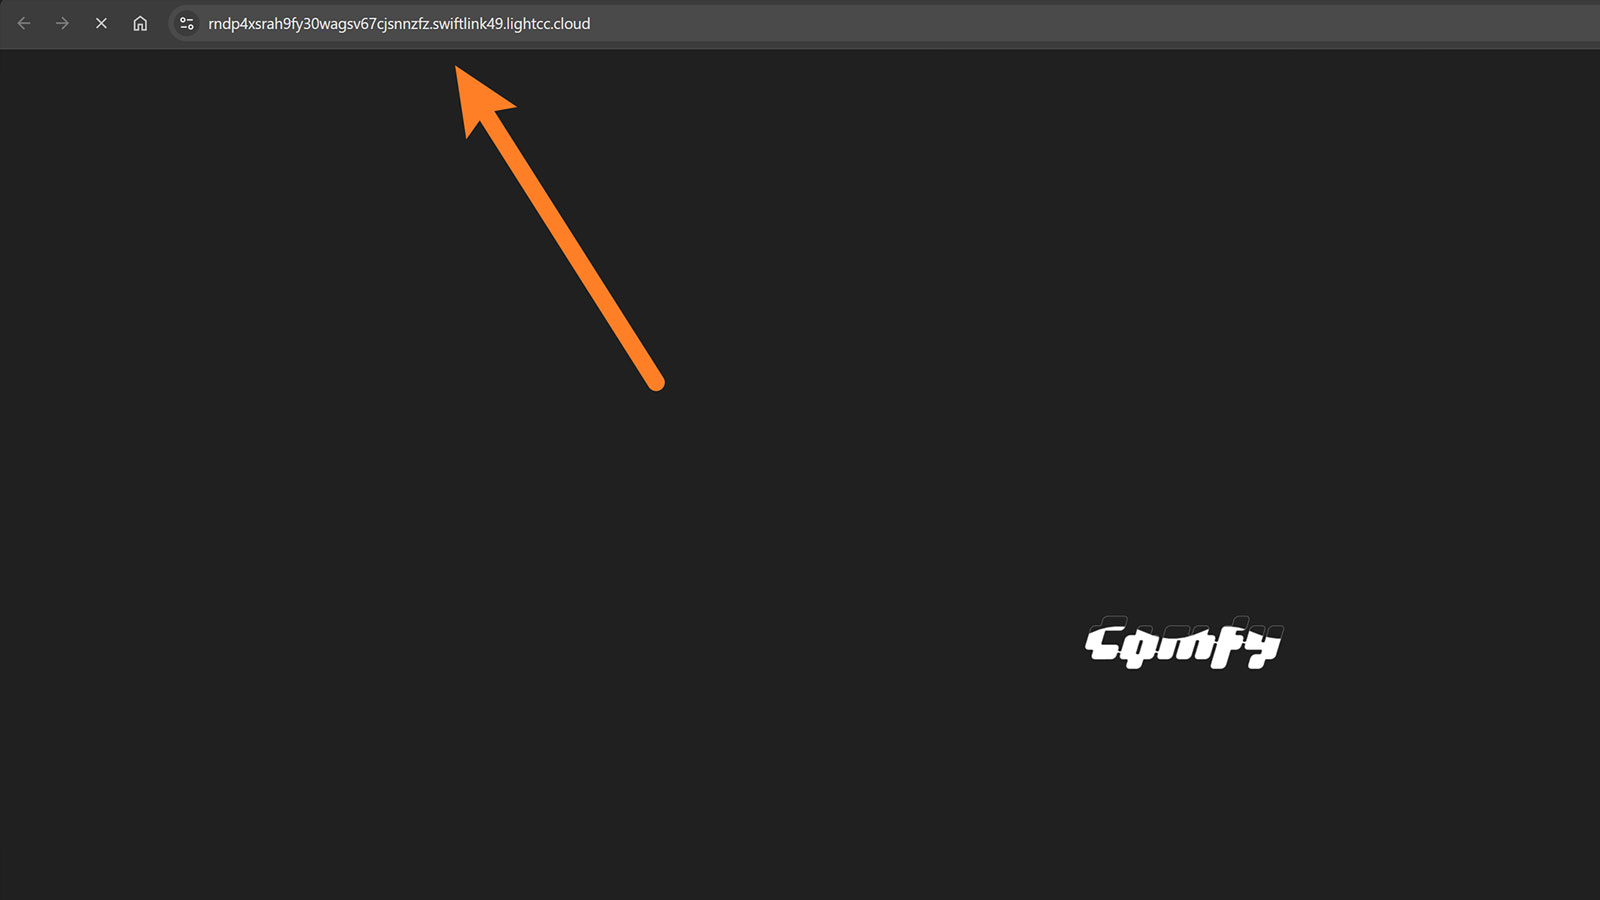
LightCC opens cloud ComfyUI in your browser. Wait for the page to load, then copy the complete HTTPS address from the browser address bar.
The address usually looks like:
https://xxxxxxxxxxxxxxxx.swiftlink49.lightcc.cloud/Copy the full address, including https://. This address is the access point for your cloud instance, so do not share it publicly.
Step 5: Add the LightCC Instance in DFCine
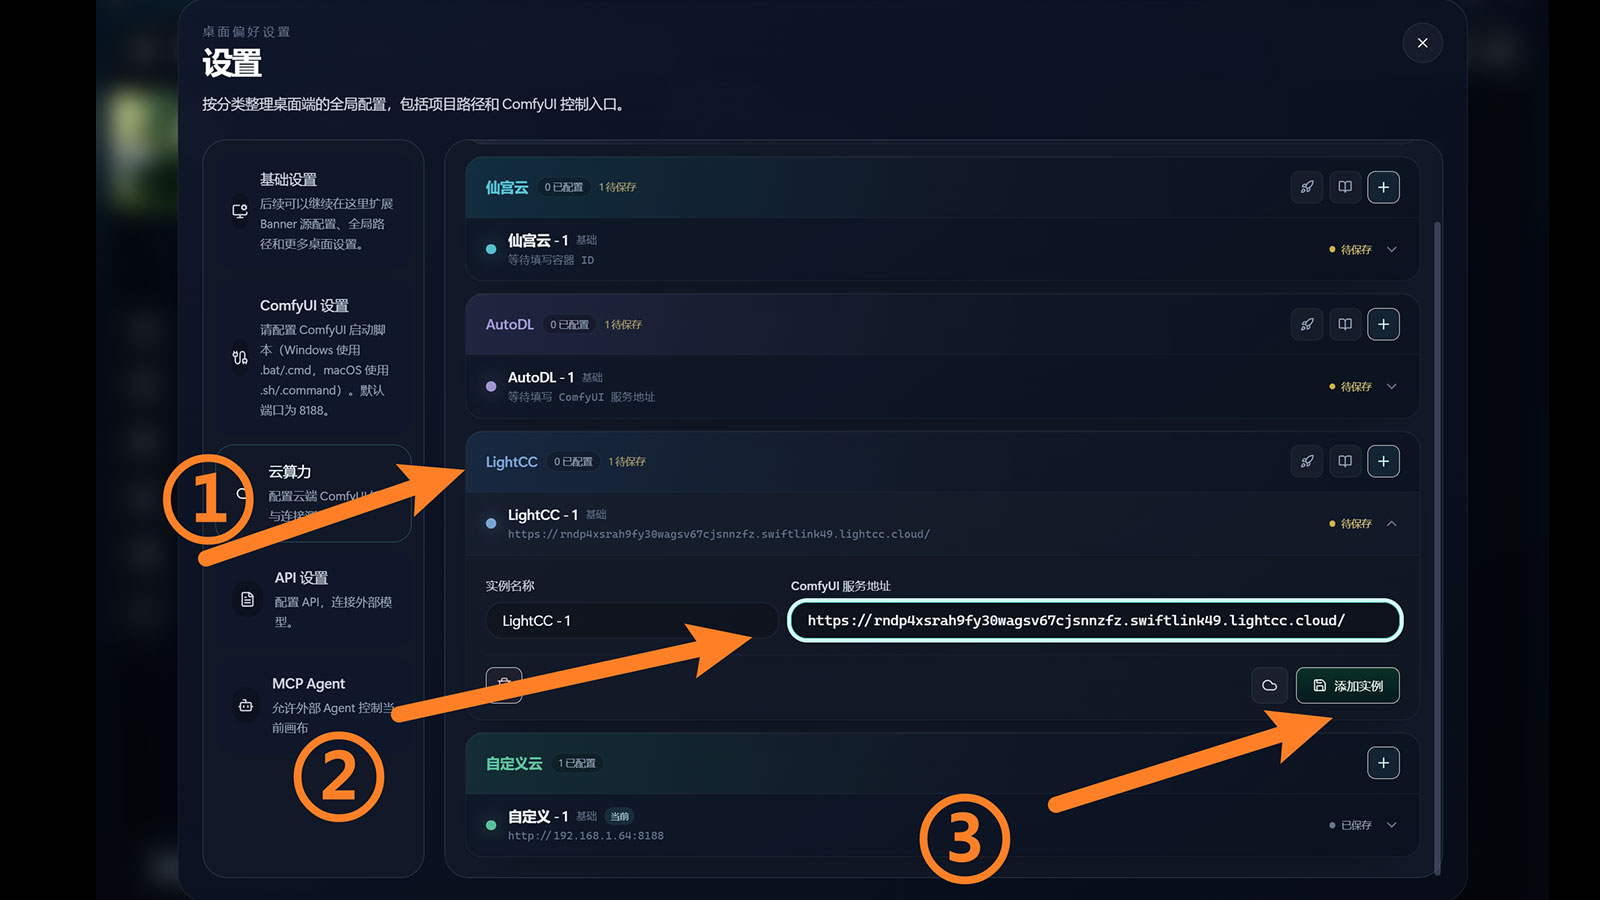
Return to DFCine and open Settings > Cloud Computing, then expand the LightCC section.
Enter a recognizable instance name, paste the complete address into ComfyUI Service Address, and click Add Instance.
Step 6: Select LightCC and Run a Workflow
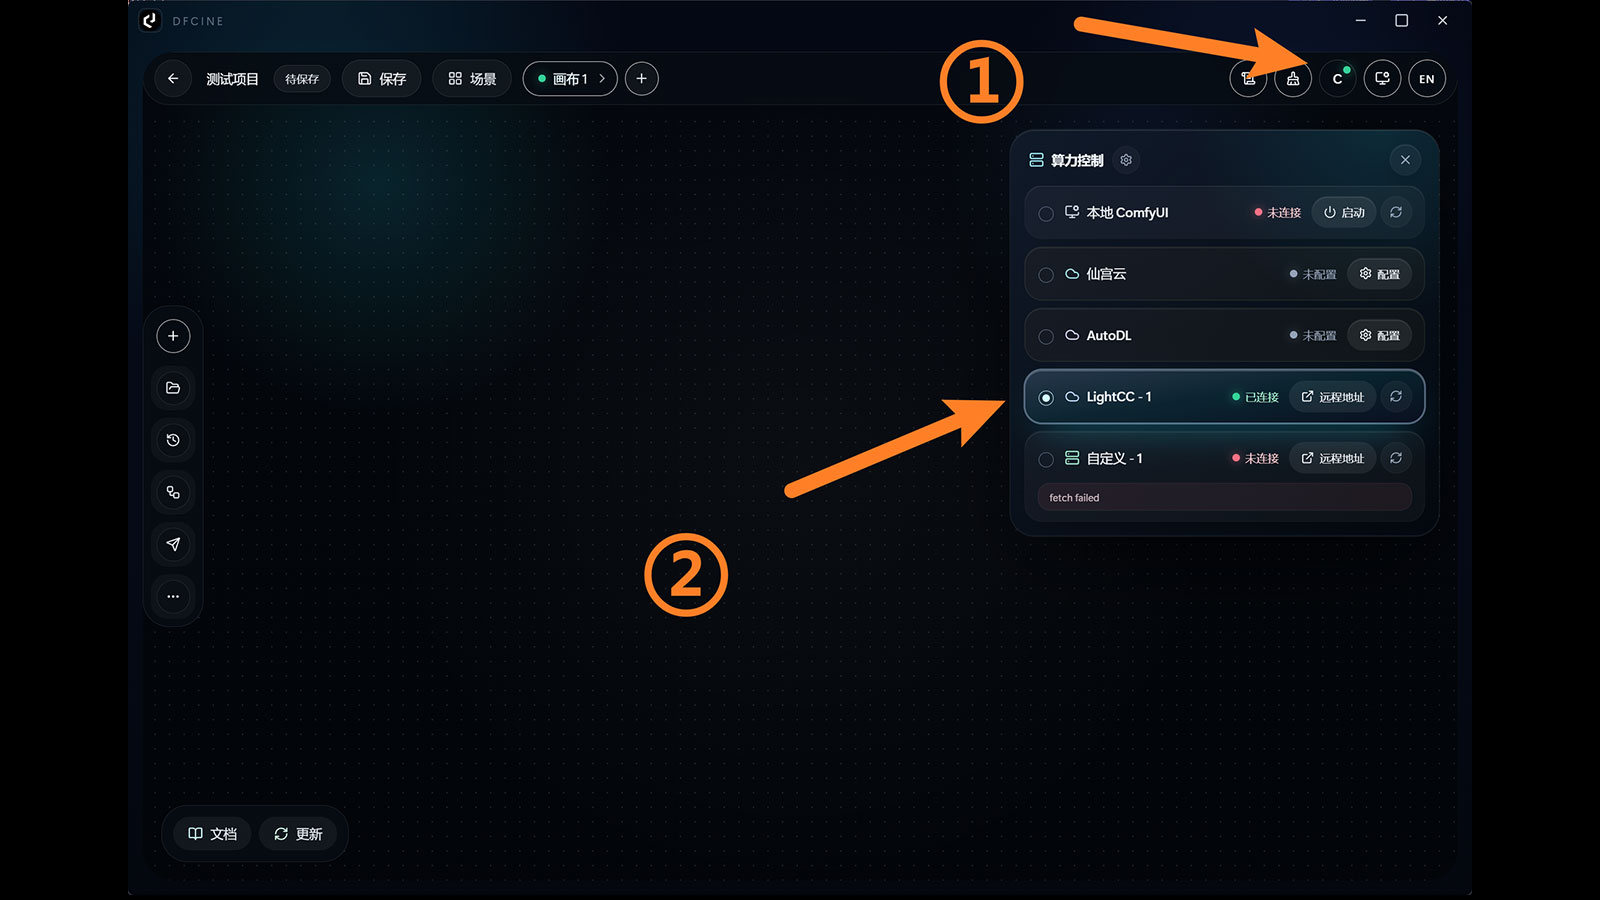
Return to the canvas and click Compute Control in the upper-right corner. Select the LightCC instance you just added.
When the instance displays a green indicator and Connected, you can run ComfyUI workflows on the canvas. The workflow is computed in the cloud, and generated results are returned to your local DFCine project.
For the first run, use a simple workflow that is known to work. Verify that the task can be submitted, processed in the cloud, and returned successfully.
Step 7: Stop and Delete the Application When Needed
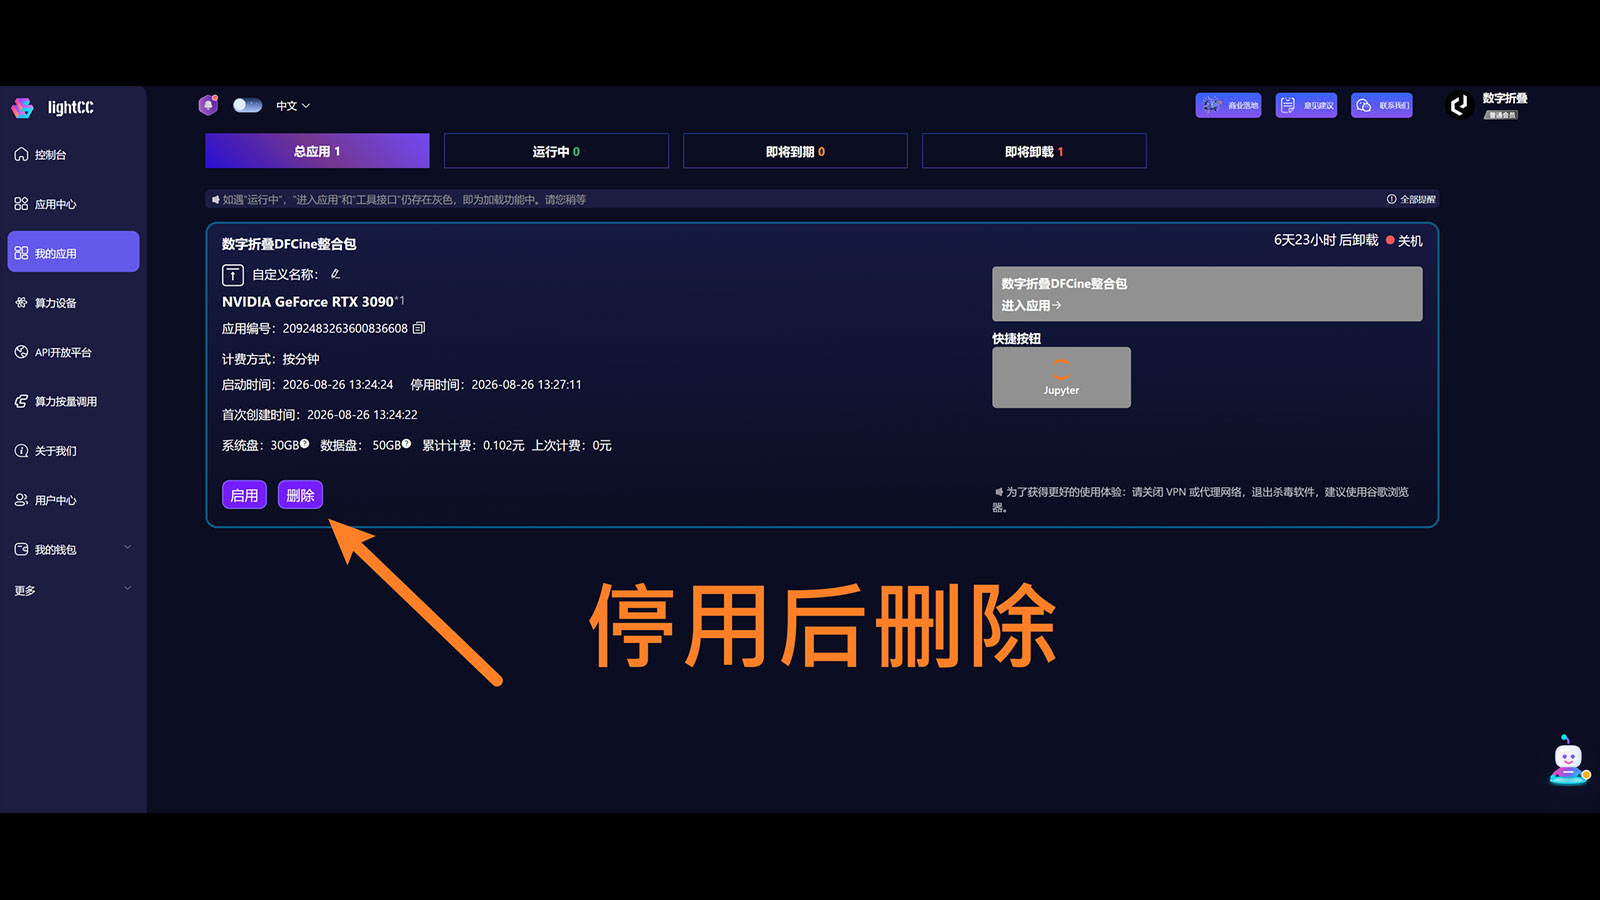
When you no longer need cloud computing, return to 我的应用 (My Apps) in LightCC and click 停用 (Stop). Wait for the application to stop running.
After confirming that generated results and any required data have been saved, click 删除 (Delete) if you no longer need the instance. Deletion is generally irreversible. Disks, cloud storage, or other services may be billed separately, so also review your account charges.